
|
 Slots On A Budget Project:
Regaining Control
How to Build an Adjustable Parma Controller
by Weird Jack
As the Borg say, “resistance is futile.” Aren’t there times you feel that this is too true? I did whenever I would pop one of my favorite old cars on the track, only to have to pull another controller off the rack because the 45 ohm Parma units I use primarily aren’t always the right.
“Hey Bozo!”, you say, “Go buy a SlotWorks or an Omni….or get one of those old Revell buzzer jobbies!”. Sure, I could do that. The transistor controllers are great, just a bit out of my price range and I am not all that keen on them for tighter home tracks. I don’t know what to say about the old Revell buzzer…..I have one…but…… A cross between Captain Kirk’s Phaser and something rather kinky, it works…..it’s just uncomfortable and awkward to use. Many people swear by them, I don’t….I swear at them. Then again, I am weird.
What’s a slothead to do then? Most of the modern scale 1/32 cars out of the UK and Spain run great with 45 ohm Parma Econo controllers, as do many of the vintage American home-set cars. What cure is there for those hotter motors needing 10-15 ohm controllers? Or should I ask, what cure is there that won’t require signing over your first-born? Read on my fellow oddbodkins, there is an inexpensive solution, you really don’t need to win the lottery to regain control.
Perusing through the dusty textbooks, we see that a resistor’s value may be reduced by placing a second resistor in parallel with it. In a perfect world the equation is stated thusly:
[(resistor times desired resistance) divided by (resistor minus desired resistance) = fixed resistor value]Or more simply put, a 45 ohm controller can be converted into a 12 ohm controller by installing a second resistor of 16.4 ohms in parallel with it. In a perfect world that is.
The realities are a bit different, but the concept does work. Is it exactly the same as having two separate controllers of different ohm ratings? No, it is not. However, it is a workable alternative.
I experimented with several ohm ratings for the fixed resistor. I wanted to use my standard Parma 45 ohm Econo controllers as a base, then have a switchable 12-15 ohms on tap when I needed it. What I finally found to work well is not in exact agreement with the formula, but it is close. It gives me 45 ohms when switched off and 12 ohms when switched on, with a cash outlay of $1.70 each.
I first went to Radio Shack and purchased SPST slide switches for $1.19 each and a pack of fixed resistors for 99 cents. Each pack contains two resistors. I used 10 ohm 10 watt resistors. These are a bit large, but will run cool. You just mount them on the outside of the controller housing.
Look at the diagram, it’s simpler to see how this is done than to explain it. Essentially, you mount the switch in the back of one half of the controller housing. Put it wherever you like, it’s your choice. The new resistor will be mounted by it’s lead wires epoxied or CYA’d into a couple grooves in the top of the housing. This places it nicely about 1/4″ above the top of the controller, out of the way. Be sure and slide some heat shrink tubing or old wire insulation onto those leads before gluing them in place….we don’t want anyone getting shocked! There is no real danger here, it’s just a precaution.
Solder 18 gauge wire from the Parma resistor to the new resistor, to the switch and back to the Parma resistor as the diagram shows. This takes longer to write about than to actually do….really!
In operation, things are pretty simple, just flick the switch when you need a lower ohm value. For most cars running Mabuchi S cans and similar motors or many vintage home-set motors, the 45 ohm resistor is fine. When you put the car with a K&B; Super Challenger or hotter vintage 16d on the track, a quick switch to 12 ohms and you are in control again. Go even lower if you feel the need to.
Of course, it goes without saying that you could add additional resistors and have a wide range of values on tap like the old MRC or Cox variable ohm controllers. I only needed two values myself. Fire up the soldering iron, pop open that Parma and create! Doc Frankenstein would be proud.
Weird Jack
(editor’s note: special link for nitpickers – click here 😉
Parts Reference List
(Radio Shack Part Numbers)
Wire wound resistor – 10 ohm 10 watt #271-132
SPST switch #275-406
Check out Jack’s Web Page!
“The Weird World of Jack”
For more information about Jack’s “Road Monkey” silicones:
“Rocket Science Road Monkeys”
(click on each image for larger view)
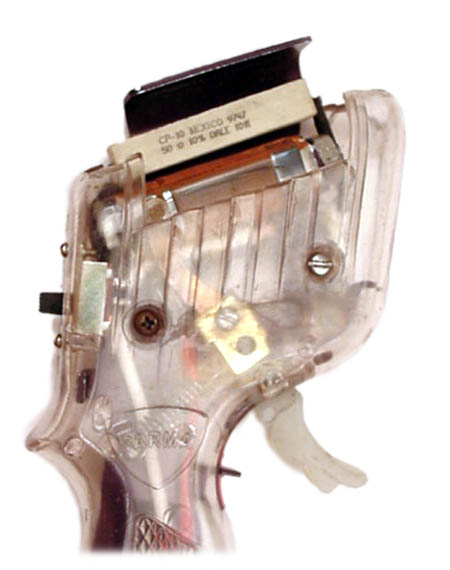
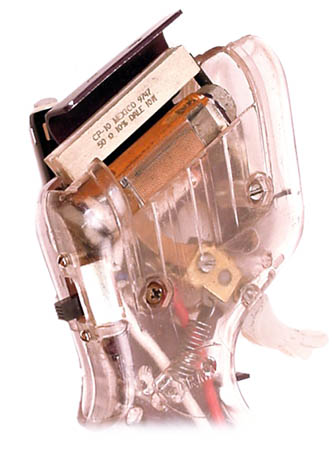
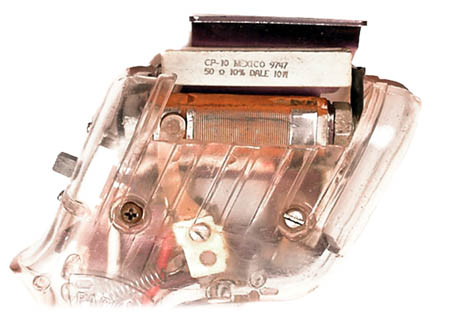
OWH’s Controller:
Here’s my Parma Turbo controller that I converted following Jack’s article above. I used a 45 ohm Parma resistor, with a 50 ohm 10 watt resistor from the local Radio Shack added on top. This gives me a 45 ohm controller that is perfect for low or no-magnet 1/32 or HO cars, like Scalextric, Ninco, MRRC, as well as T-Jets on a fast track. A flip of the switch gives me about 25 ohms, which is great for stronger magnet cars, like newer Scalextric & Fly 1/32’s, as well as for G+, Lifelike, Tyco 440’s, etc. HO’s.
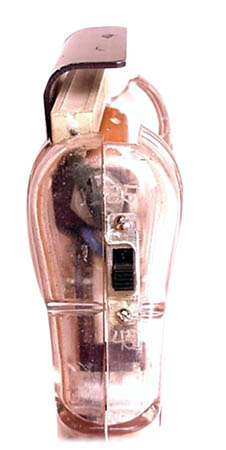
My first one (pictured above) had the switch on the back. My second one I built recently has a heavier toggle style switch on the front of the controller.
I use mine all the time for both 1/32 and HO racing, and it works great!
Paul Kassens – OWH